This document provides instructions for customers to create a private endpoint to connect to the Compass APIs.
The customer can connect to Compass using a public or private endpoint.
When customers do not want to use a public network or have concerns about data transfers through the internet, they can reach out to the Compass team to get a private endpoint.
To use a private endpoint, customers need an Azure Portal with an active subscription, and there are a few configurations to perform from their side, whose information can be found in the preceding sections.
Prerequisites
-
An Azure account with active subscription
Create a Private Endpoint
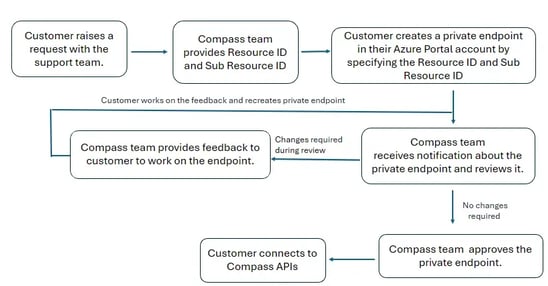
To get a private endpoint, raise a request with the Compass Support Team.
The Compass team will provide customer with a Resource ID and a Sub-resource ID.
After receiving the Resource ID, create the private endpoint by following the instructions below:
-
Go to Azure portal.
-
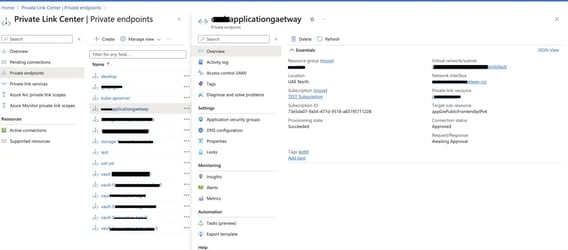
Search for and select Private Link Center.
-
Select the Private endpoint tab.
-
Click Create.
-
On the Basics tab, configure a resource group, name, and region for the Private Endpoint; click Next.
-
On the Resource tab, do the following and click Next.
-
Select Connect to an Azure resource by resource ID or alias.
-
Enter the Resource ID received from Compass team.
-
Paste the value from Frontend IP Configuration tab in Step 5 into the Target sub-resource field.
-
-
On the Virtual Network tab, configure a virtual network and subnet where the private endpoint network interface should be provisioned. Configure whether the private endpoint should have a dynamic or static IP address; click Next.
-
On the Tags tab, optionally configure resource tags; click Next.
-
Click Create.
The Compass team will review the request and approve the private endpoint. If any changes are required to the private endpoint, the Compass will provide assistance.
If approval is received within 24 hours of submitting the private endpoint approval request, please write to Compass Support Team.
Test the Private Endpoint
After the request is approved, test the private endpoint by following the instructions below.
-
Log in to your Azure Portal account.
-
Go to the Private Link screen.
-
Go to Private Endpoints.
-
Select the private endpoint created in the above section.
-
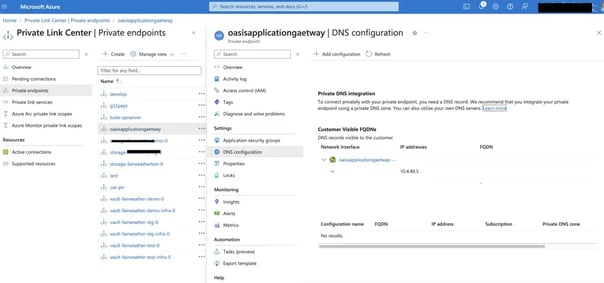
Select DNS configuration.
-
Find the IP address.
The customer should be able to connect to the services through the private IP address. For any assistance, reach out to the Compass support team.