The Resources page displays all the resources you have subscribed to along with their current status.
To access the resources page, click Workspace > Resources.
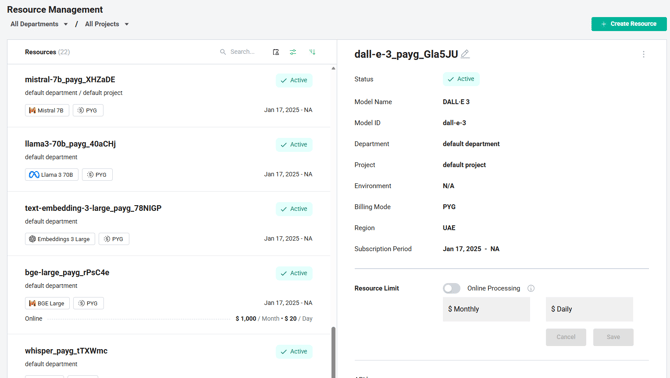
On this page, you can view:
-
Resource name
-
Model’s name
-
Billing mode
-
Region
-
Subscription Period
-
Associated API keys
-
Resource limit
- Resource status (active/expired/expiring soon)
What You Can Do on the Resources Page
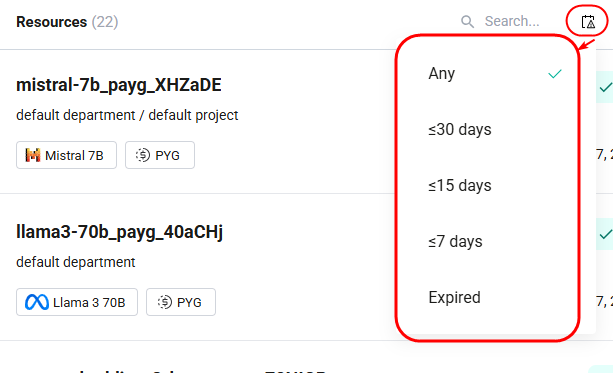
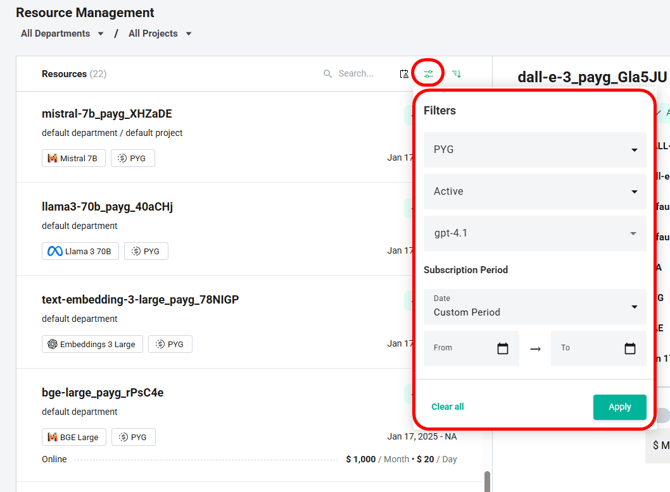
From this page, you can:
-
Assign API keys to resources
-
Search for resources using any keyword
-
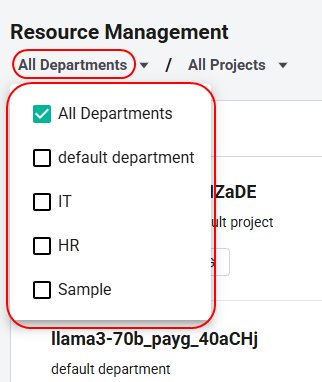
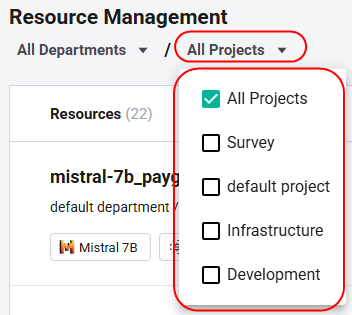
Filter resources based on:
-
Resource expiry (30 days / 15 days / 7 days / Expired / Any)
-
Billing mode
-
Resource status
-
Model
-
Subscription period
-
Department
- Project
-
Create a Resource
To create a resource:
1. Click Create Resource.
2. Enter the resource name and select the model to which you want to associate the resource.
3. Based on the selected model, additional fields may appear (such as Batch, Online Processing, Time period, and billing information). Select these options as needed.
3. Click Create.
The resource gets created successfully.
You can edit, regenerate, or unassign API keys associated with a resource.
To manage an API key for a resource:
-
In the API Key column, click the three dots (:).
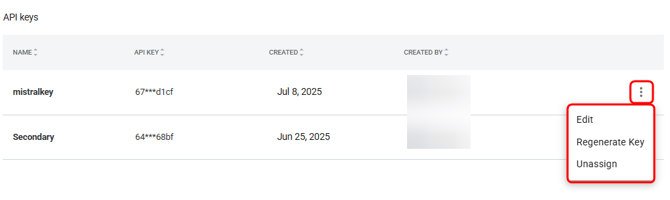
-
Choose one of the following:
-
Edit: Modify the existing API key.
-
Regenerate Key: Generate a new API key.
-
Unassign: Remove the API key from the resource.
-
Things to Consider When Associating the API Keys with a Resource
If an API key is already associated with the specific model under one resource type, it cannot be associated with the same model under a different resource type.